Web Server Compromise - light up the WAF
Cloud initiatives are allowing administrators to start up servers all over the place, and most of the time they do not have the same protections in the cloud they typically would in the physical datacenter DMZ. This attack could also be applied for lateral movement if the vulnerable web application is only accessible internally.
This purpose of this paritcular exercise is to demonstrate various alerts that will be prevented when adversaries are in the discovery phase exploiting resources by using common web application security scanning tools. Damn Vulnerable Web Application is being used so that the scanners can find problematic elements and dig deeper, resulting in more attacks being launched.
Step 1 - Deploy Damn Vulnerable Web Application
DVWA is going to act as our origin server. Deploy it somewhere you will be able to get at it, and proxy it through Cloudflare. In this case it's deployed in GCP on a Linux host running Docker.
Typically I like to build my own docker containers from scratch rather than deploying an already built container because you don't know what people are putting in their containers. In this particular case the container is maintained by the author of DVWA so rather than building a new one from scratch we will use theirs.
docker run --rm -it -p 80:80 vulnerables/web-dvwa
Once the container has started navigate to your new vulnerable web application.
http://ip.address
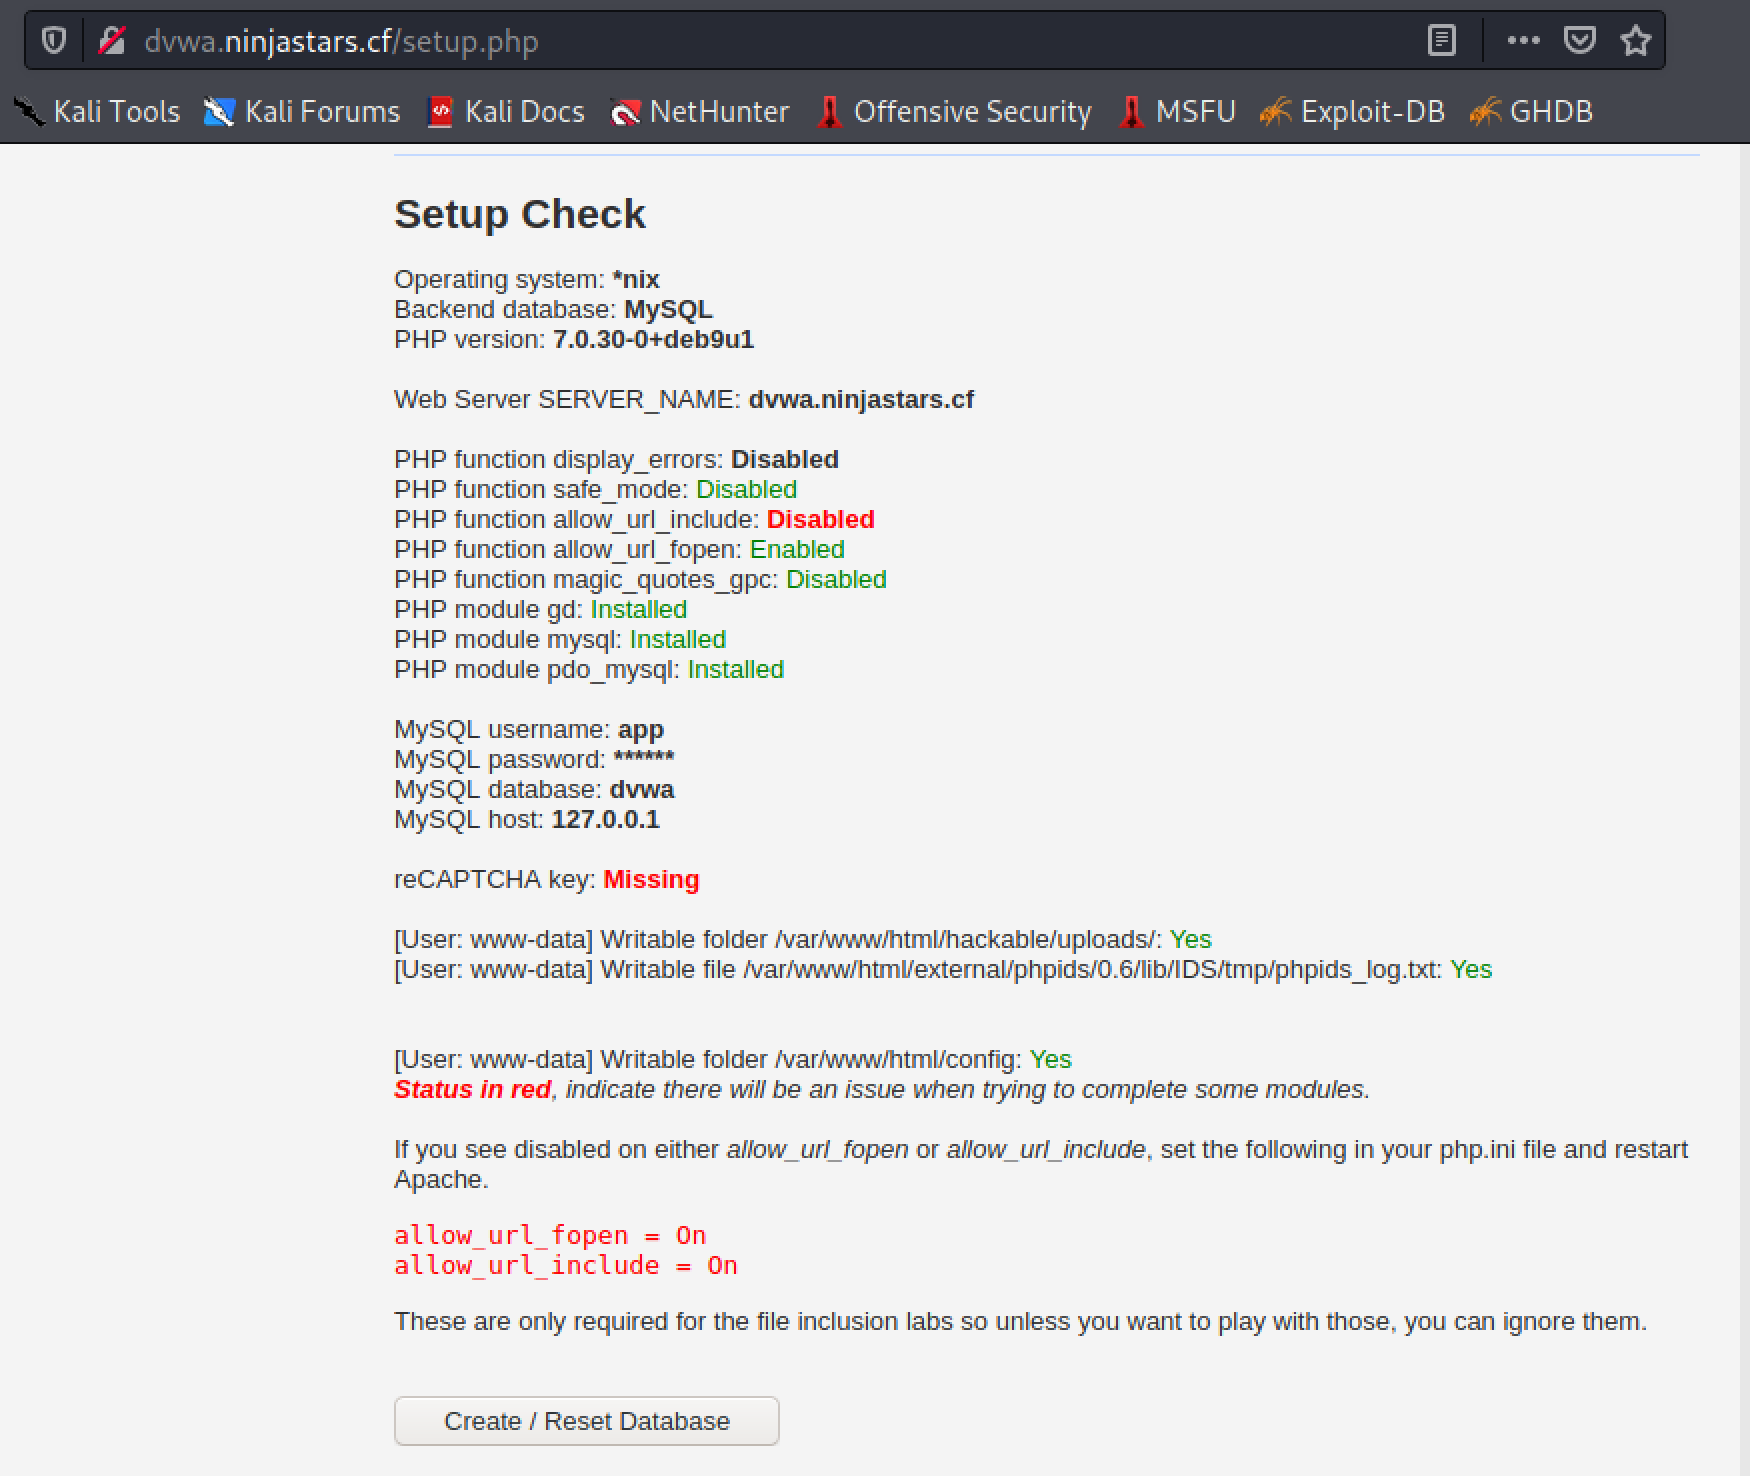
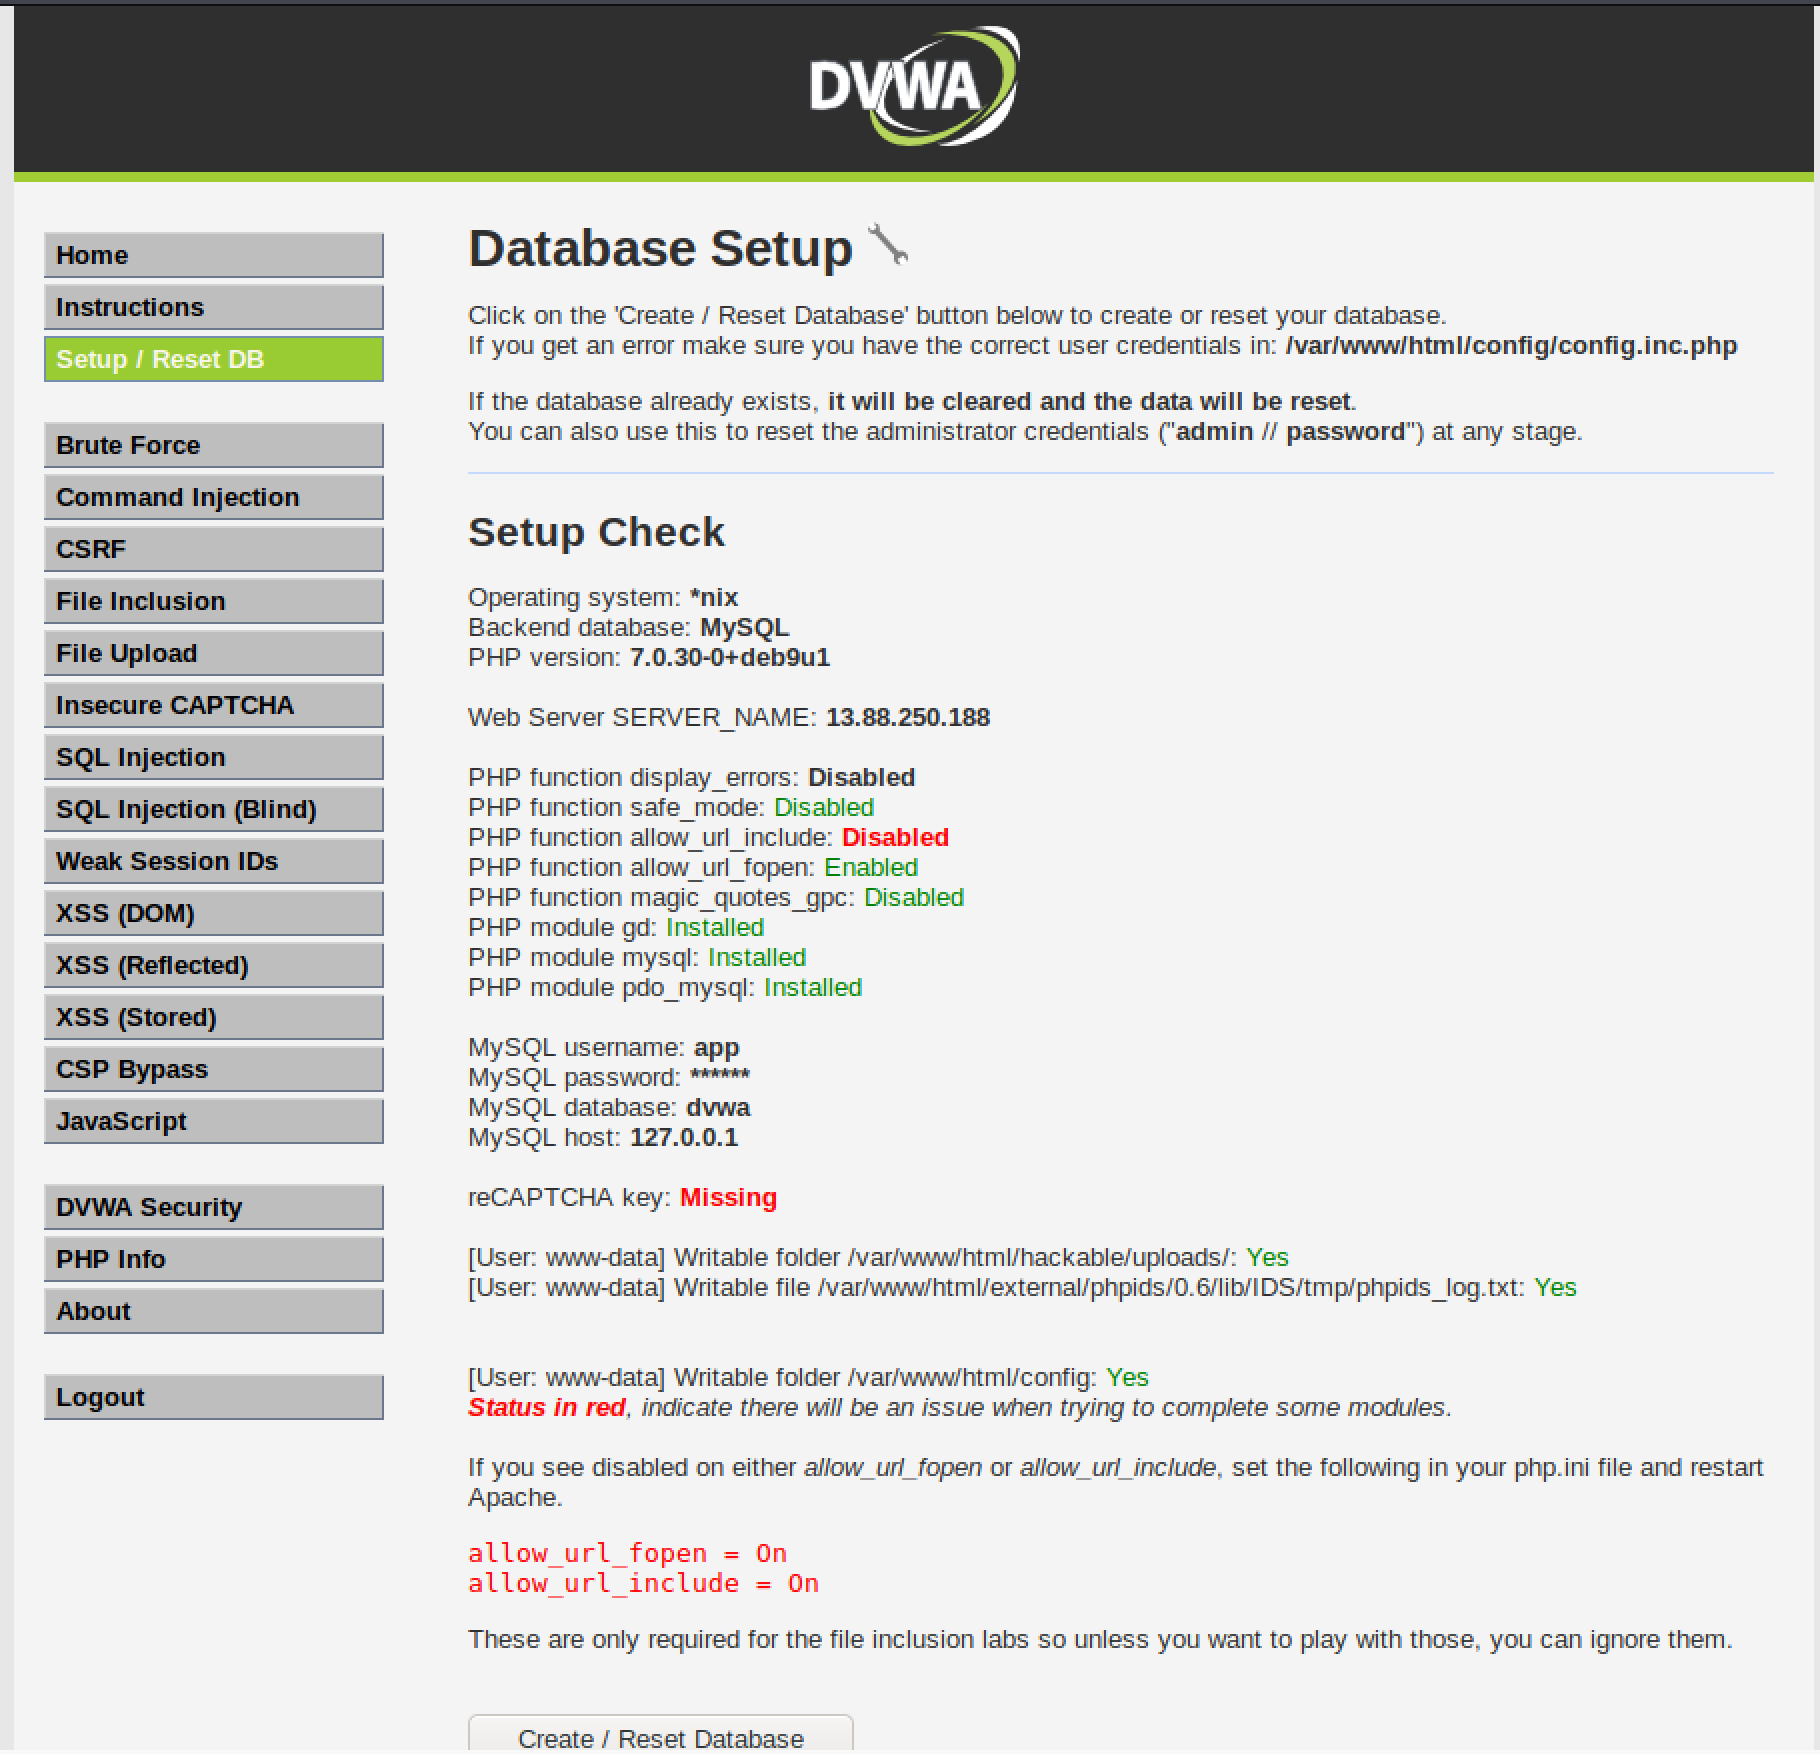
The default credentials are admin:password. You may have to click the Setup/Reset DB option and then click the same named button at the bottom of the page, which looks like this.
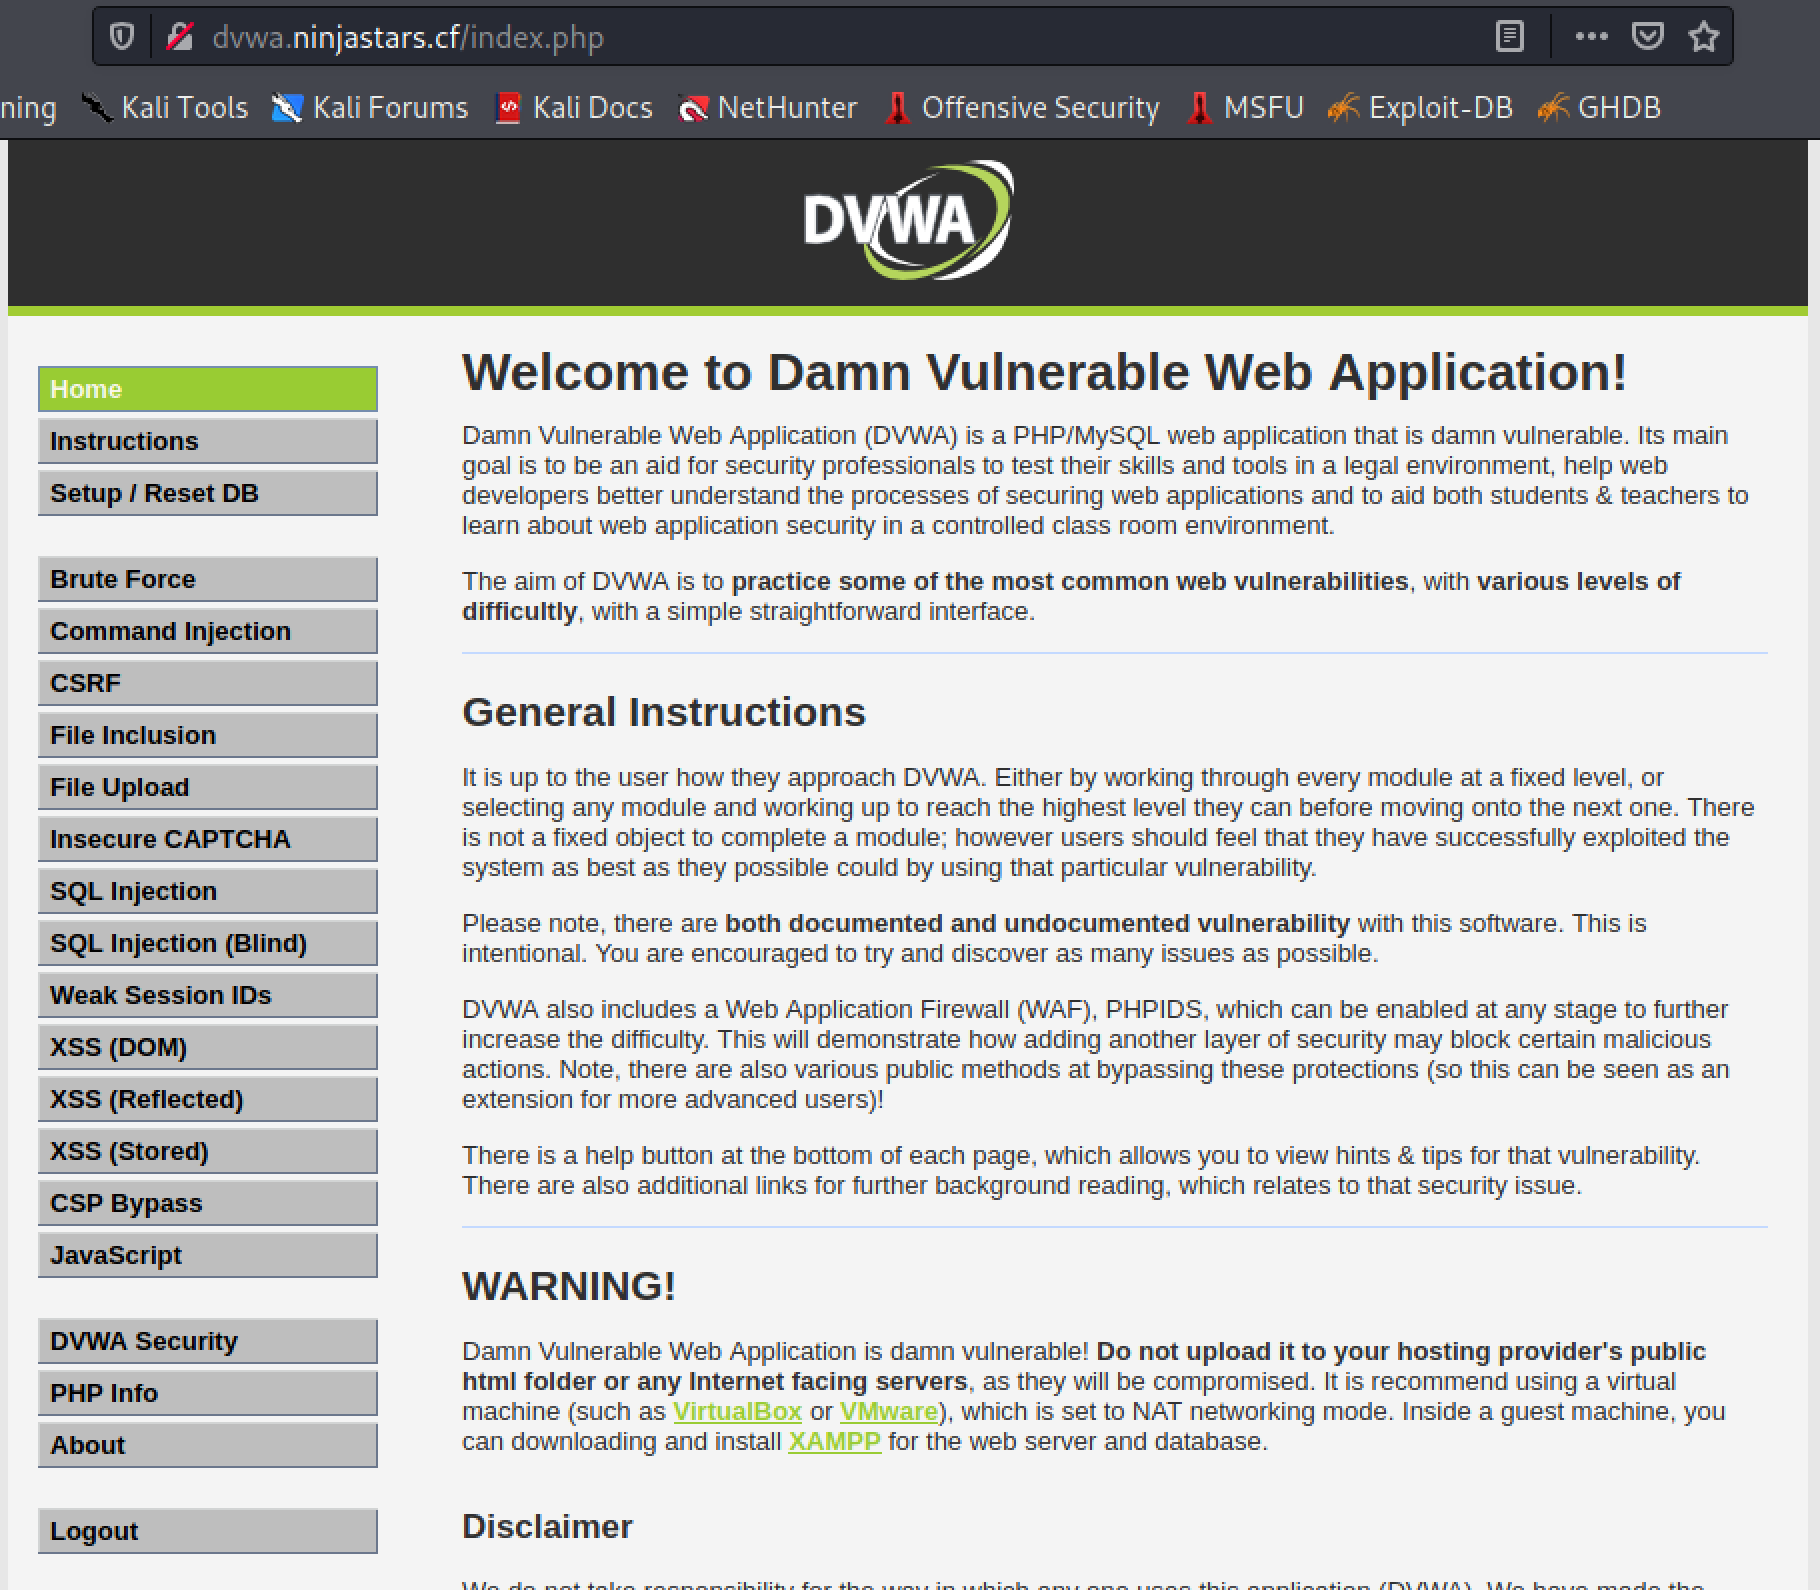
Once setup when you refresh the page you will be on the Welcome page.
Step 2 - Run Nikto
Nikto has been around for a long time from a software perspective but is still a great tool for web application testing. You can install it on your local machine or VM, and it comes pre-installed with Kali.
Run nikto
┌──(root💀kali)-[~stephen]
└─# nikto -h http://dvwa.ninjastars.cf/vulnerabilities -id admin:password
- Nikto v2.1.6
---------------------------------------------------------------------------
+ Target IP:          104.18.2.47
+ Target Hostname:    dvwa.ninjastars.cf
+ Target Port:        80
+ Message:            Multiple IP addresses found: 104.18.2.47, 104.18.3.47
+ Start Time:         2021-05-13 12:31:24 (GMT-4)
---------------------------------------------------------------------------
+ Server: cloudflare
+ The X-XSS-Protection header is not defined. This header can hint to the user agent to protect against some forms of XSS
+ Uncommon header 'cf-request-id' found, with contents: 0a082aa14e00003ff1501d5000000001
+ The X-Content-Type-Options header is not set. This could allow the user agent to render the content of the site in a different fashion to the MIME type
+ All CGI directories 'found', use '-C none' to test none
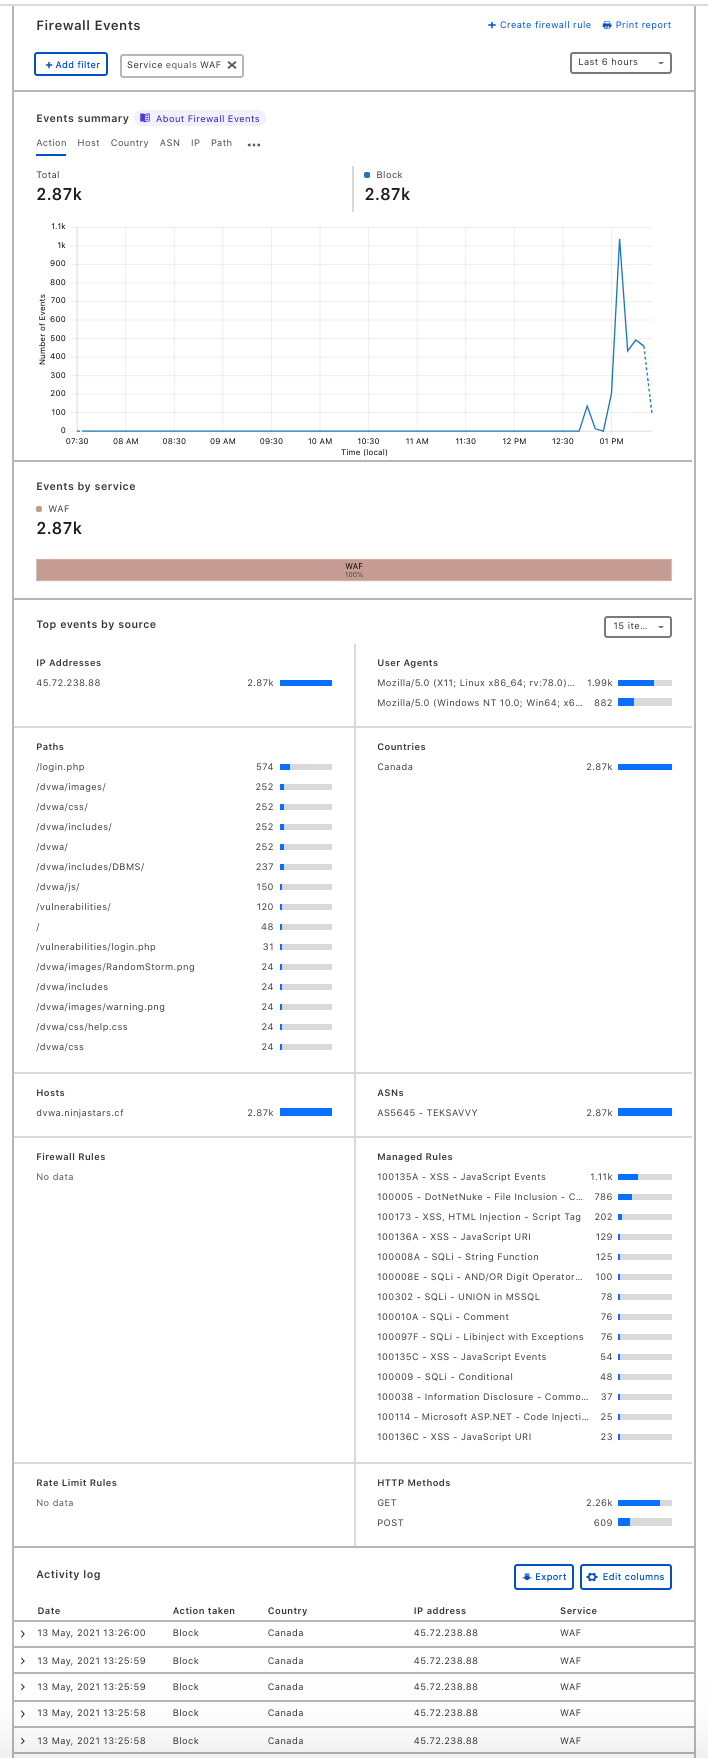
You can skip ahead and check the Firewall, Overview tab to see the visibility and control available.
Step 3 (Optional) - Setup ZAP (more cumbersome but better for manual testing)
Zed Attack Proxy is a more robust web application testing program that also comes with automated crawling and scanning. We will be using it very rudimentarily just to generate some alerts.
ZAP can be installed locally on your machine, and also comes with Kali.
Because DVWA requires authentication we will need to configure ZAP to authenticate to the app. In order to do that we need to intercept a login and save it in the ZAP context so that when ZAP is confronted with a login page it will use the credentials supplied.
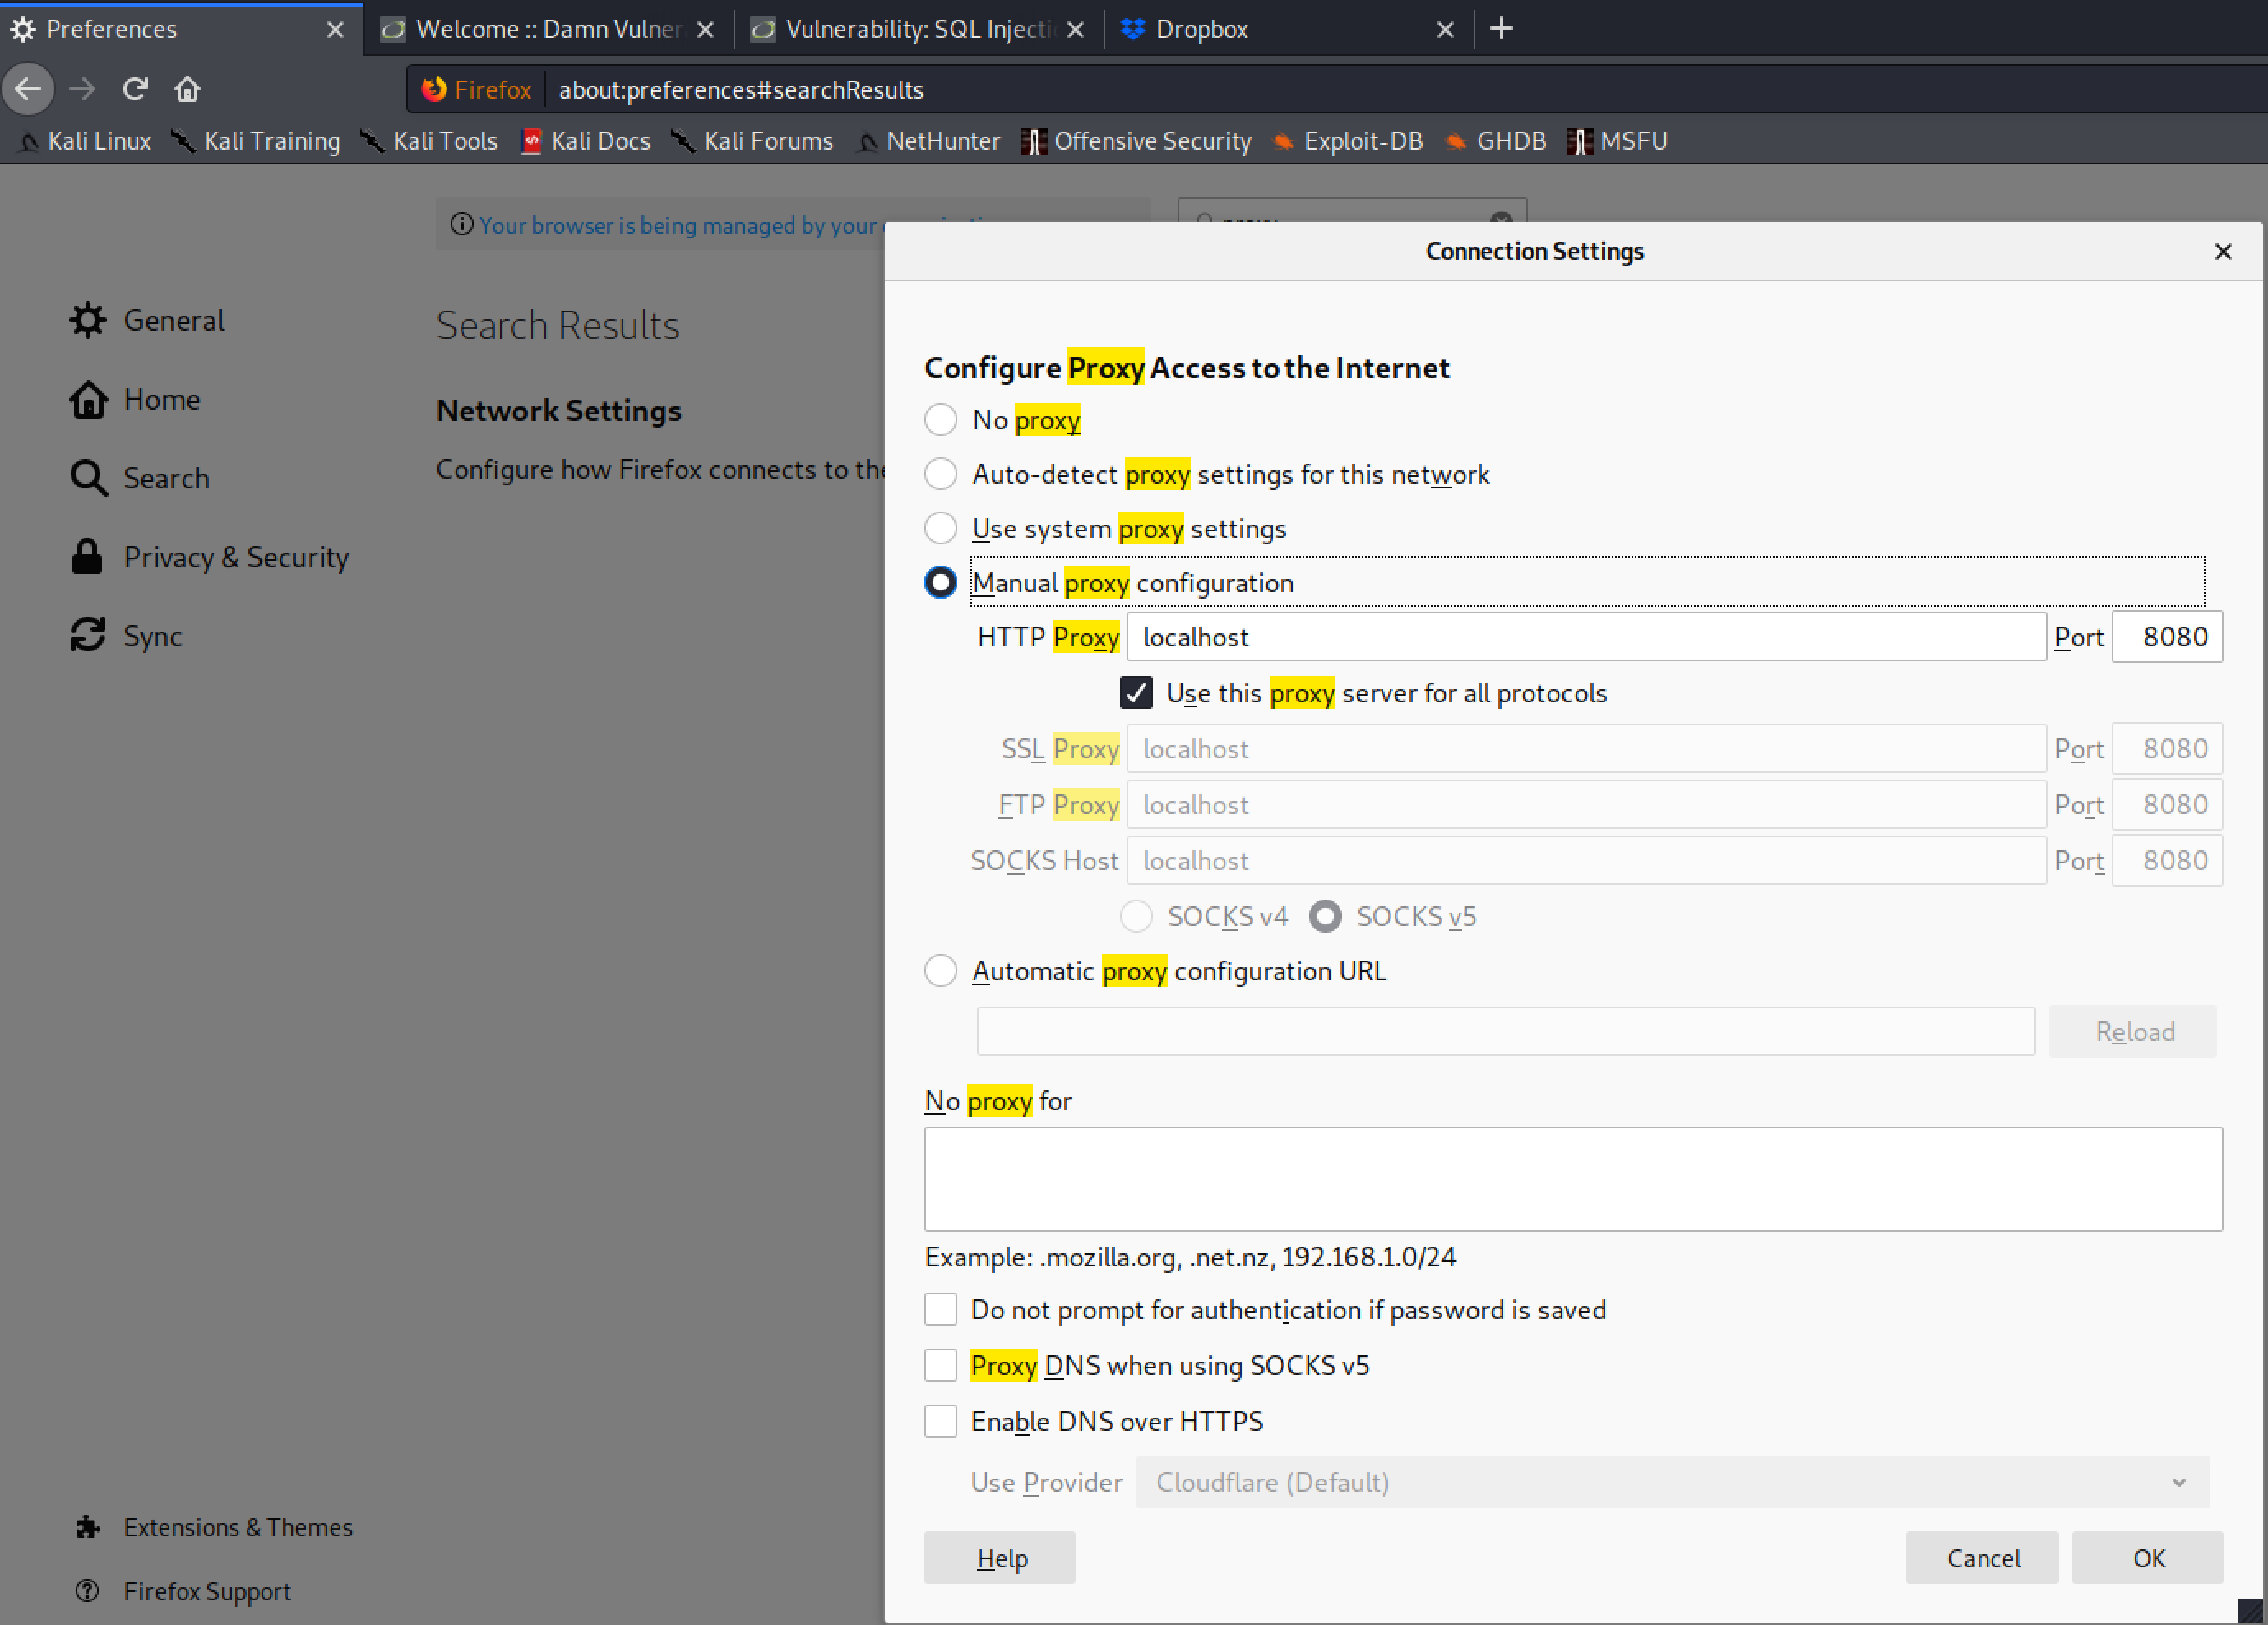
Start ZAP and configure the local proxy settings for ZAP by navigating to Tools, Options.
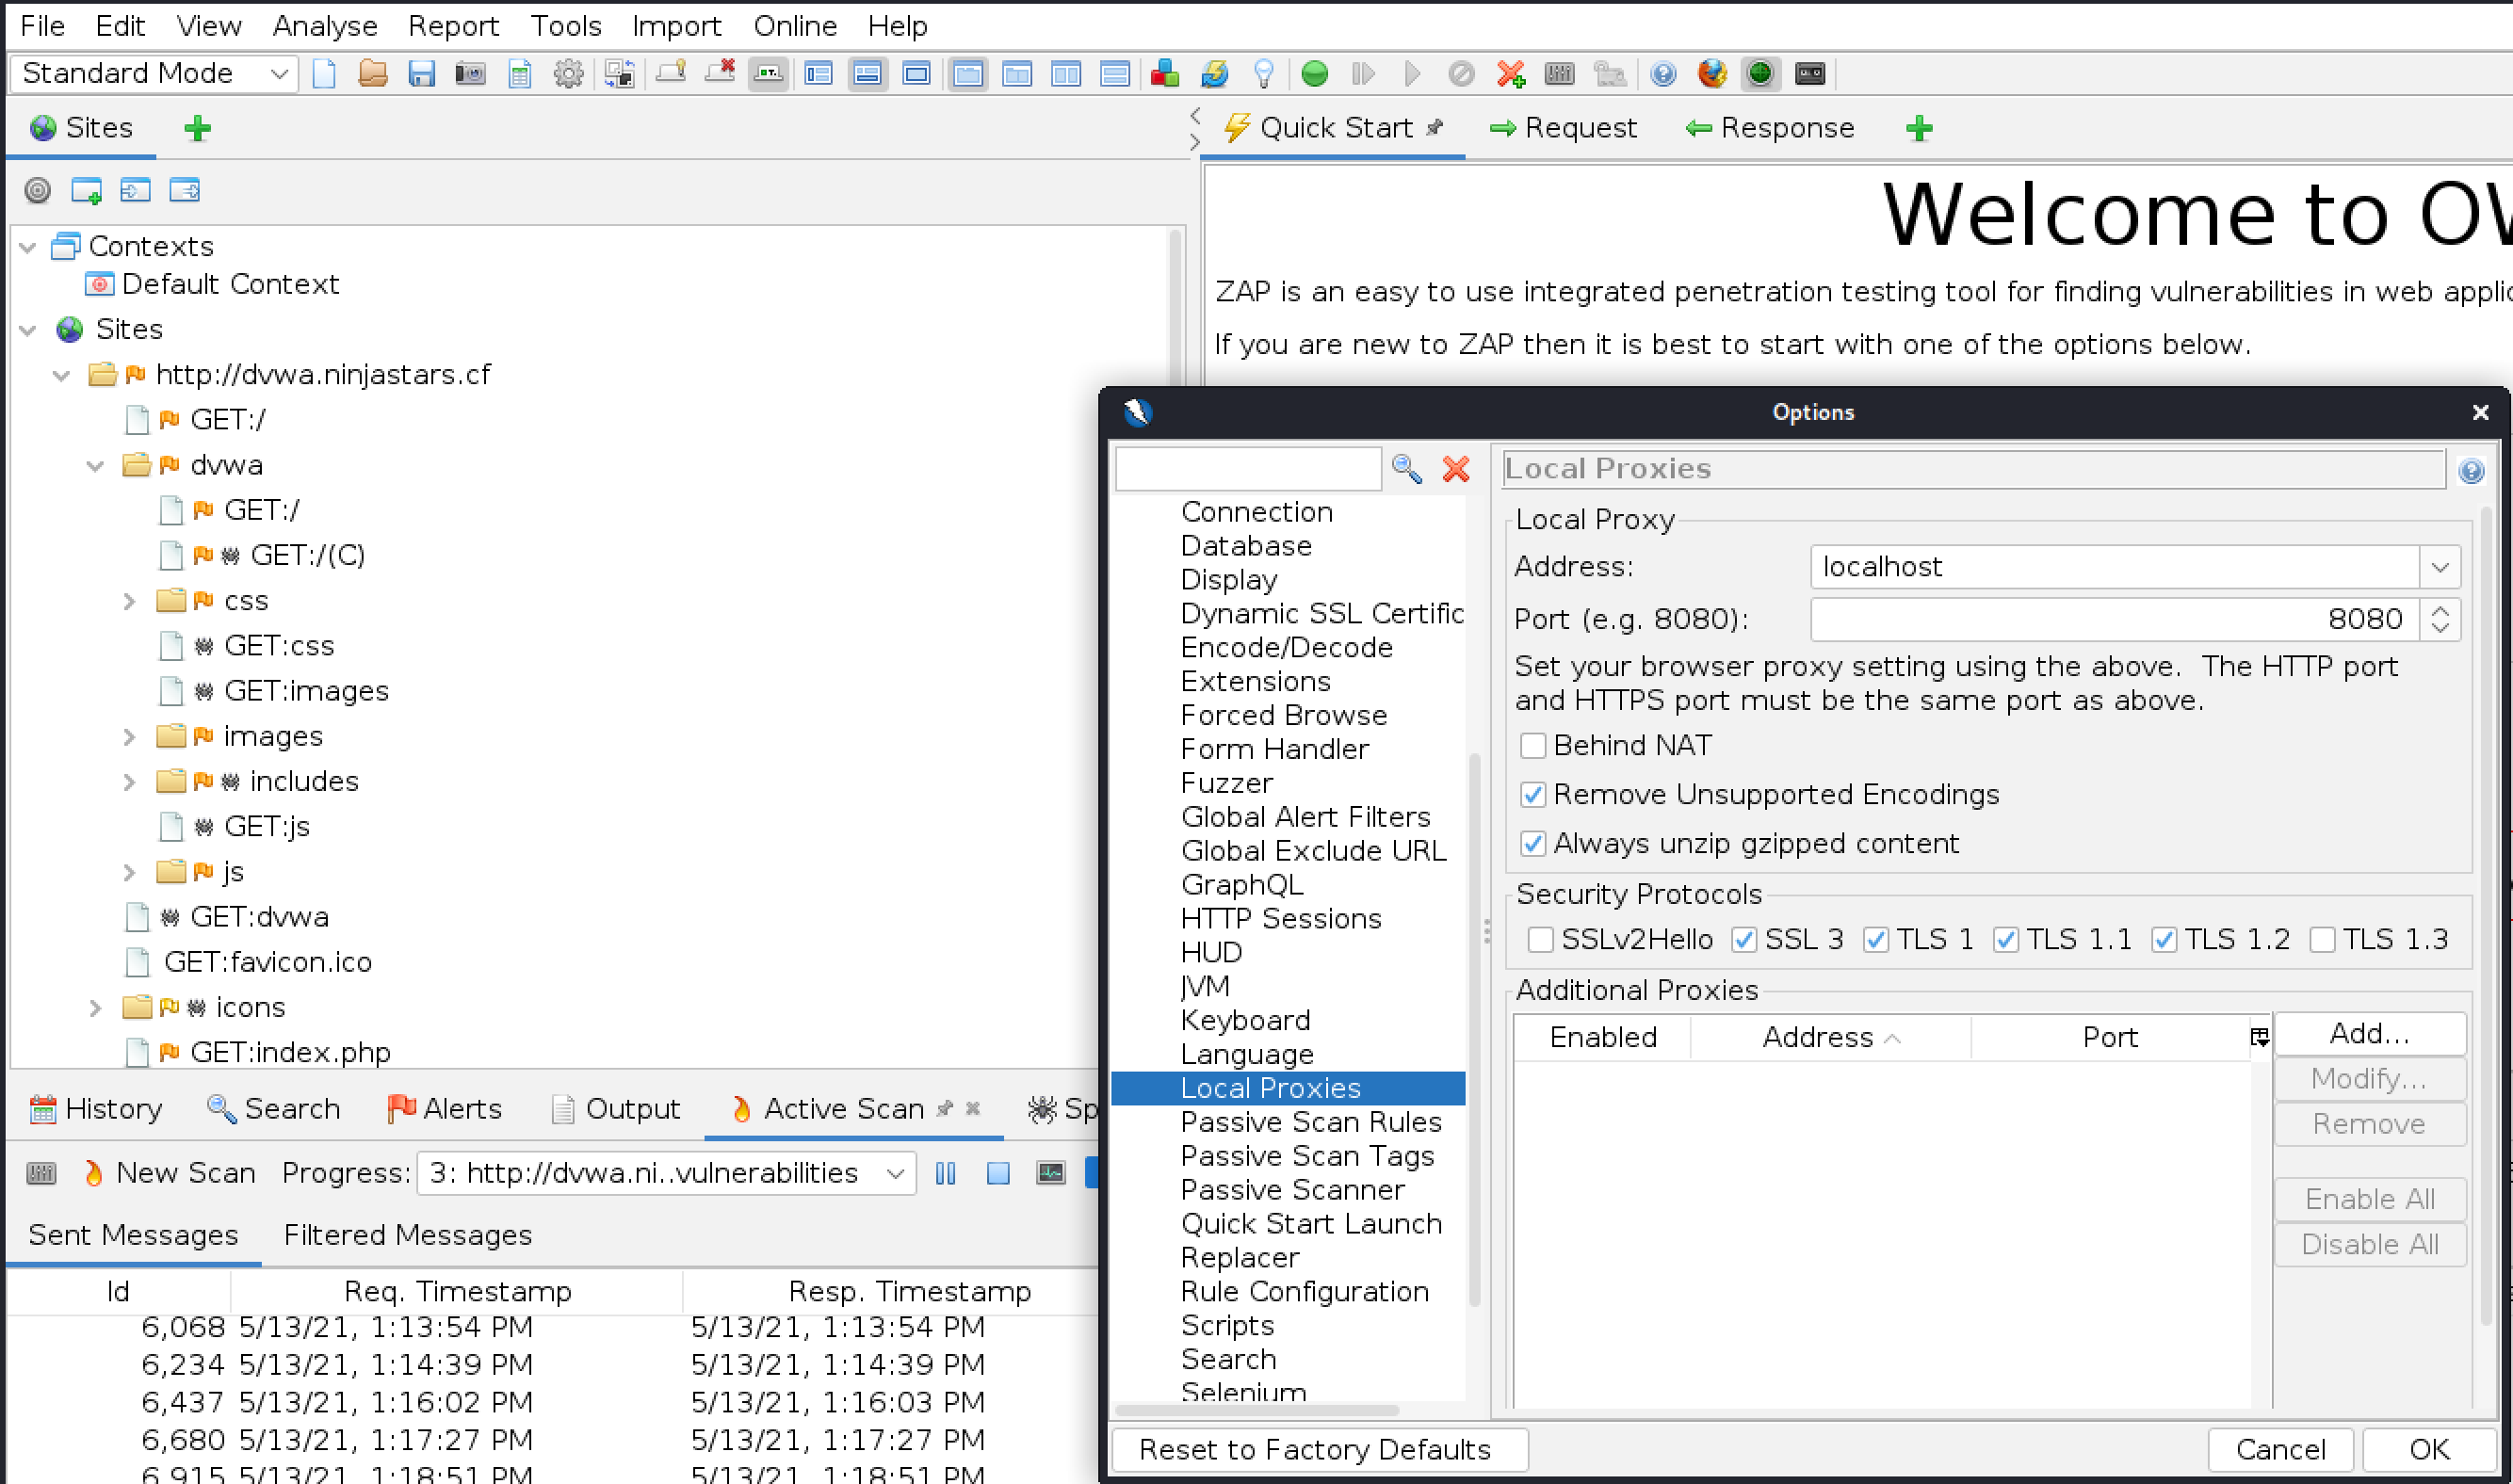
Configure your web browser to proxy all traffic through ZAP. Make sure you use the same port in ZAP and the browser, and to check use this proxy for all protocols.
Browse to the IP address of your DVWA. You may get an SSL warning, which you can accept. Login with admin:password.
From the following page click the button at the bottom, Create / Reset DB
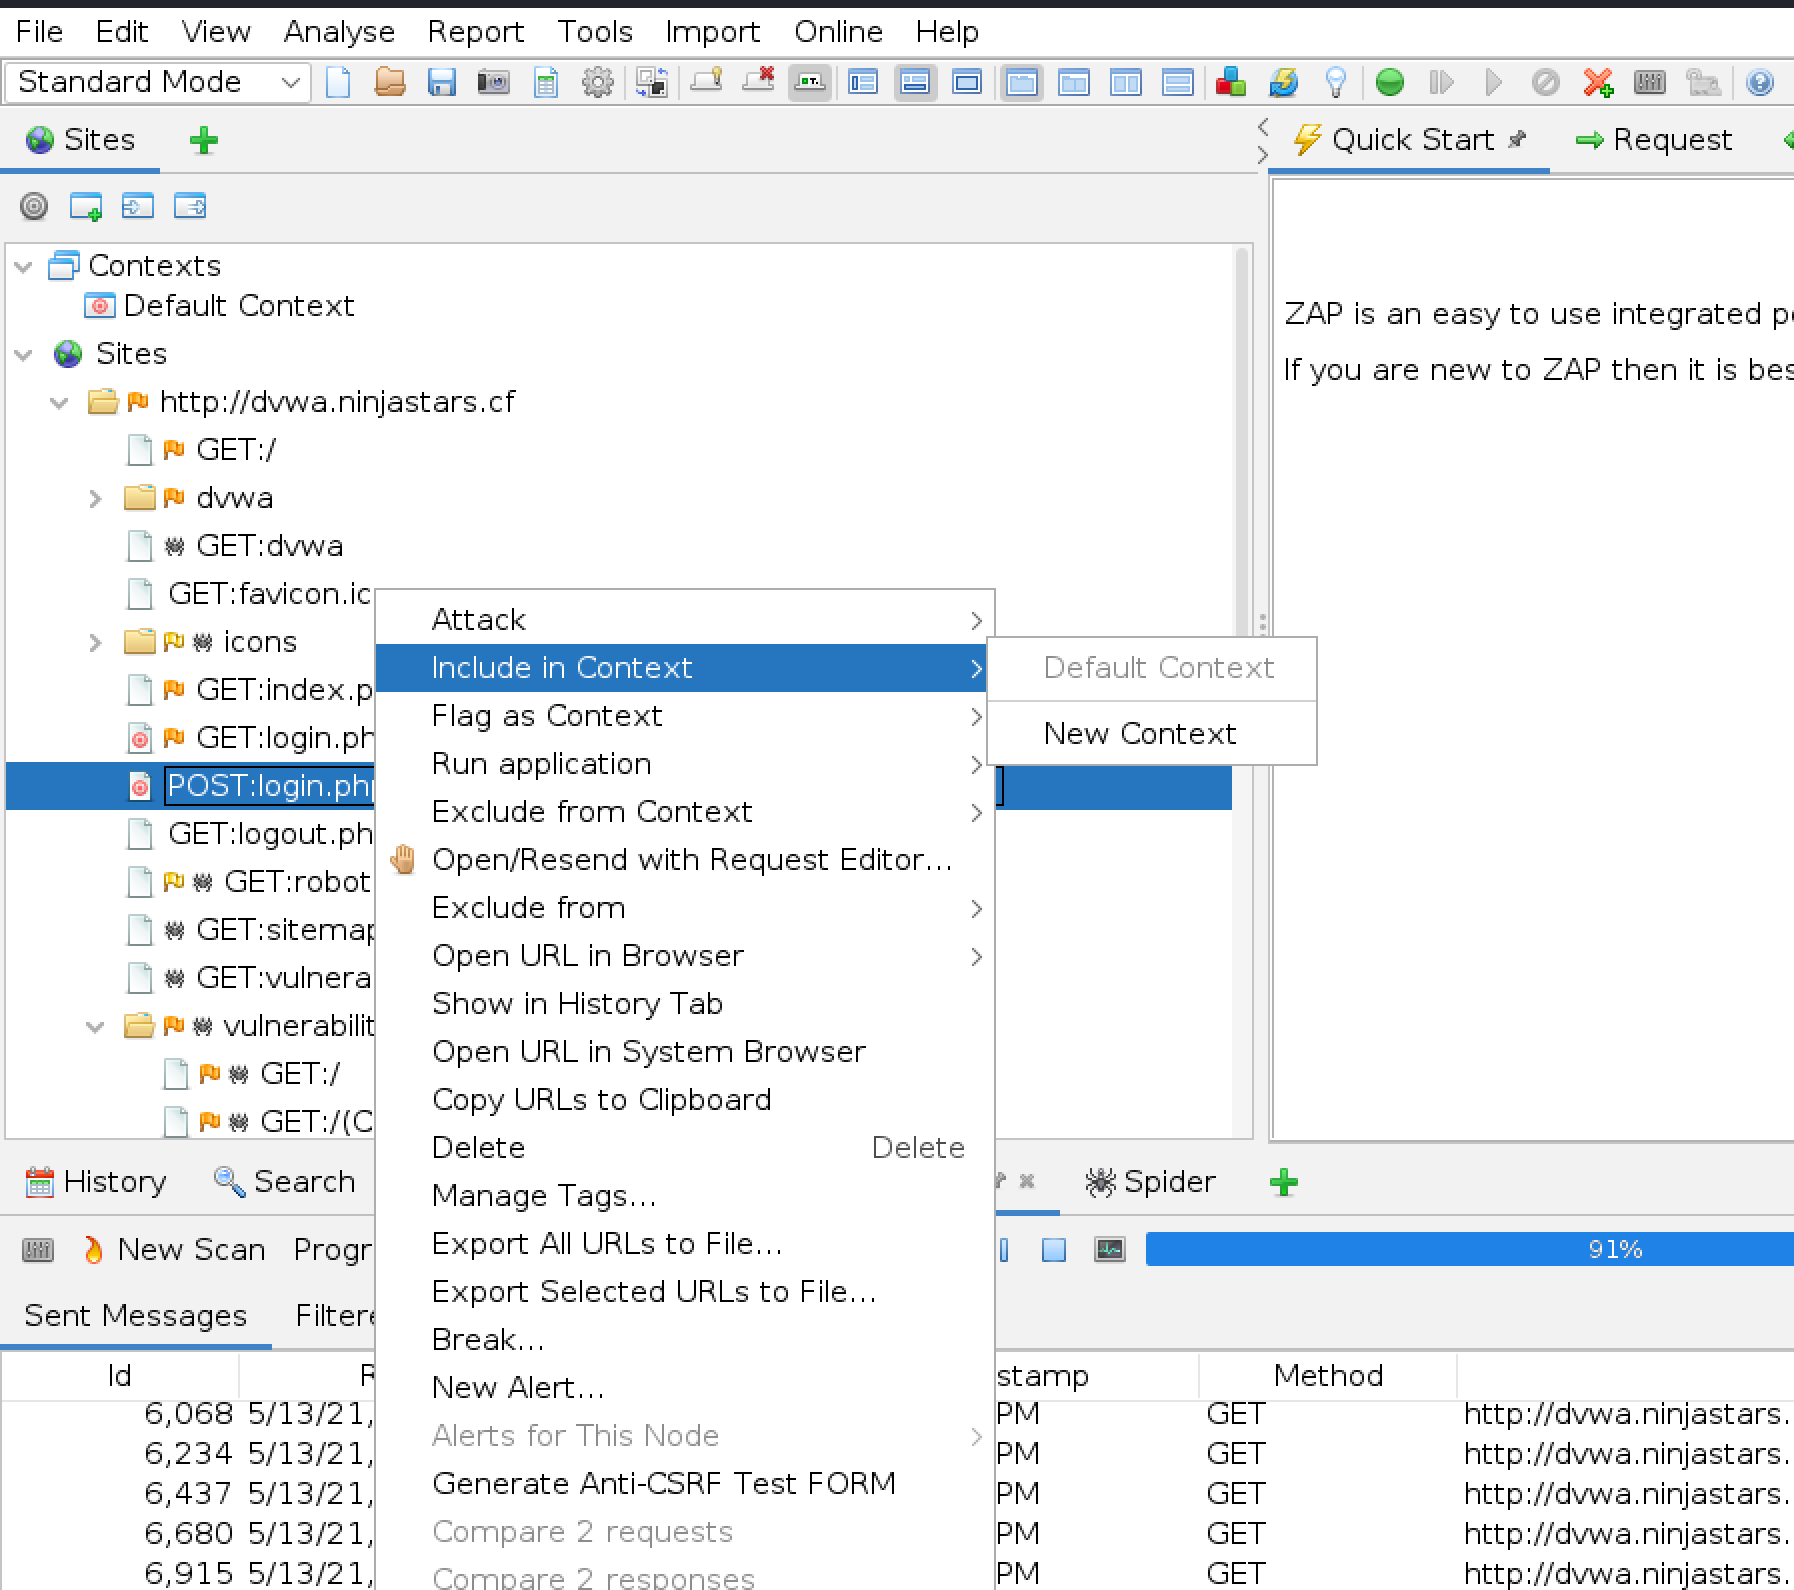
Back in ZAP, add the login credentials to the default context. From the navigation tree right click on the login POST and Include in context
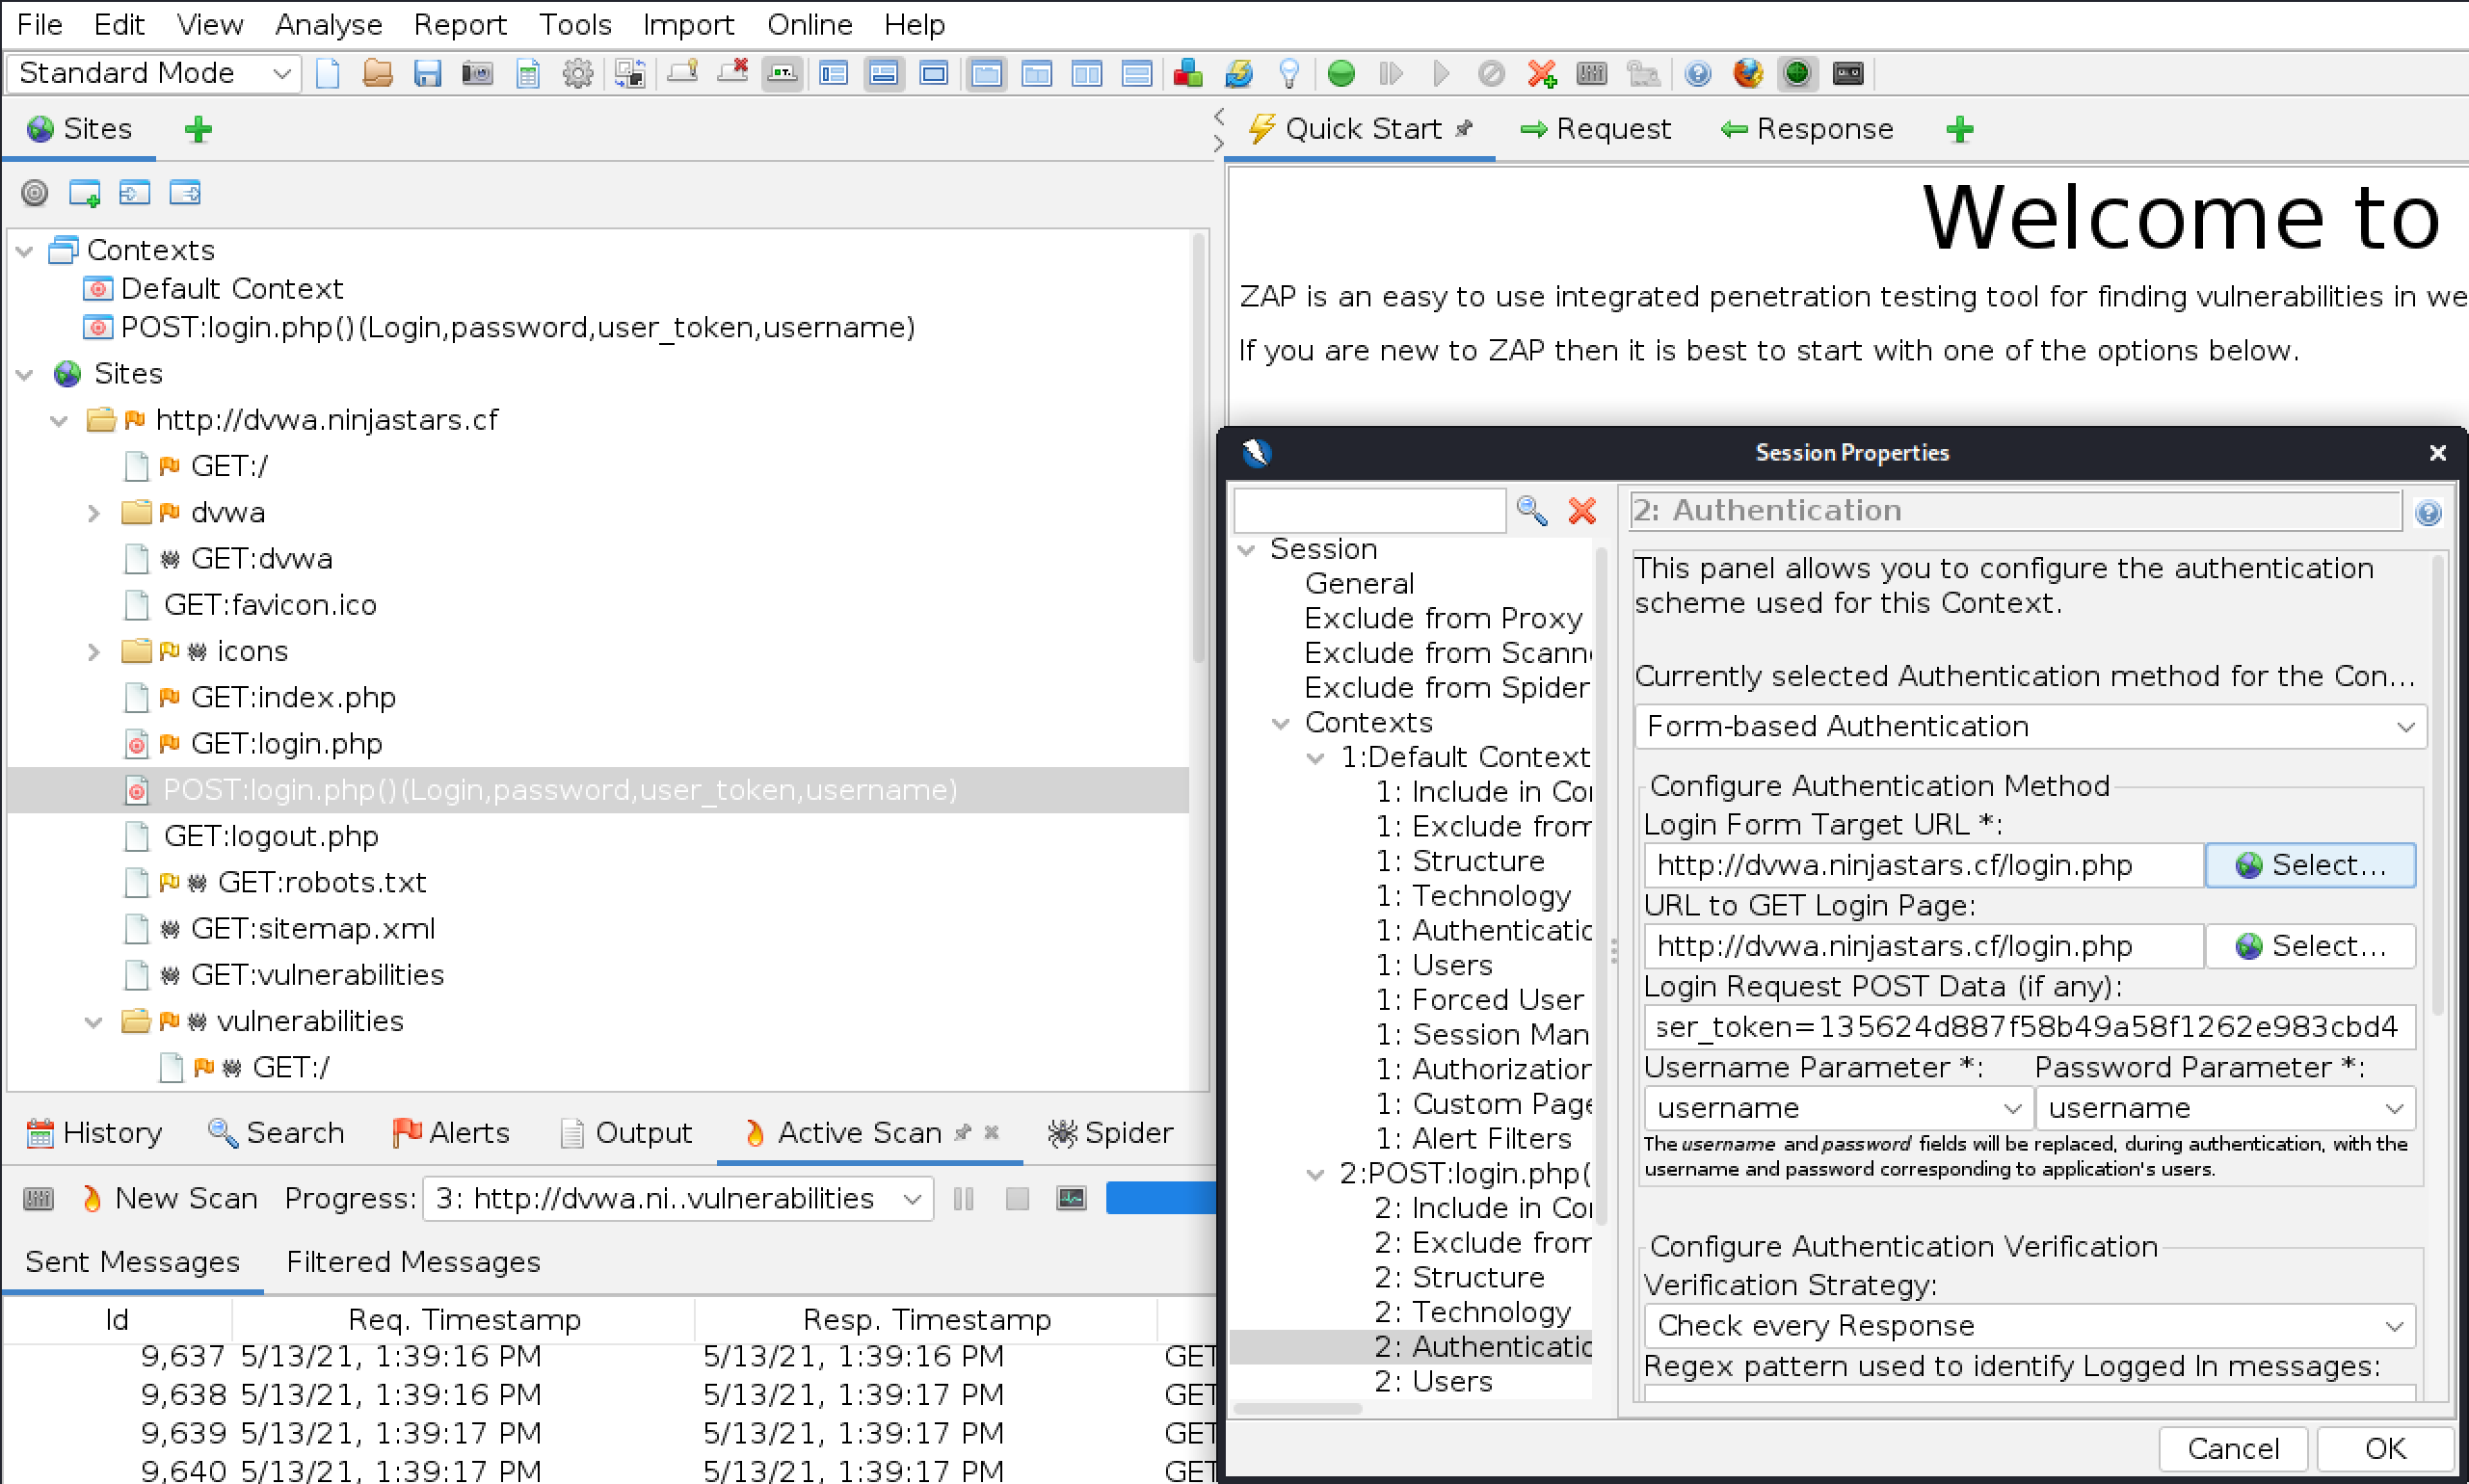
Edit the credentials so that they look like this
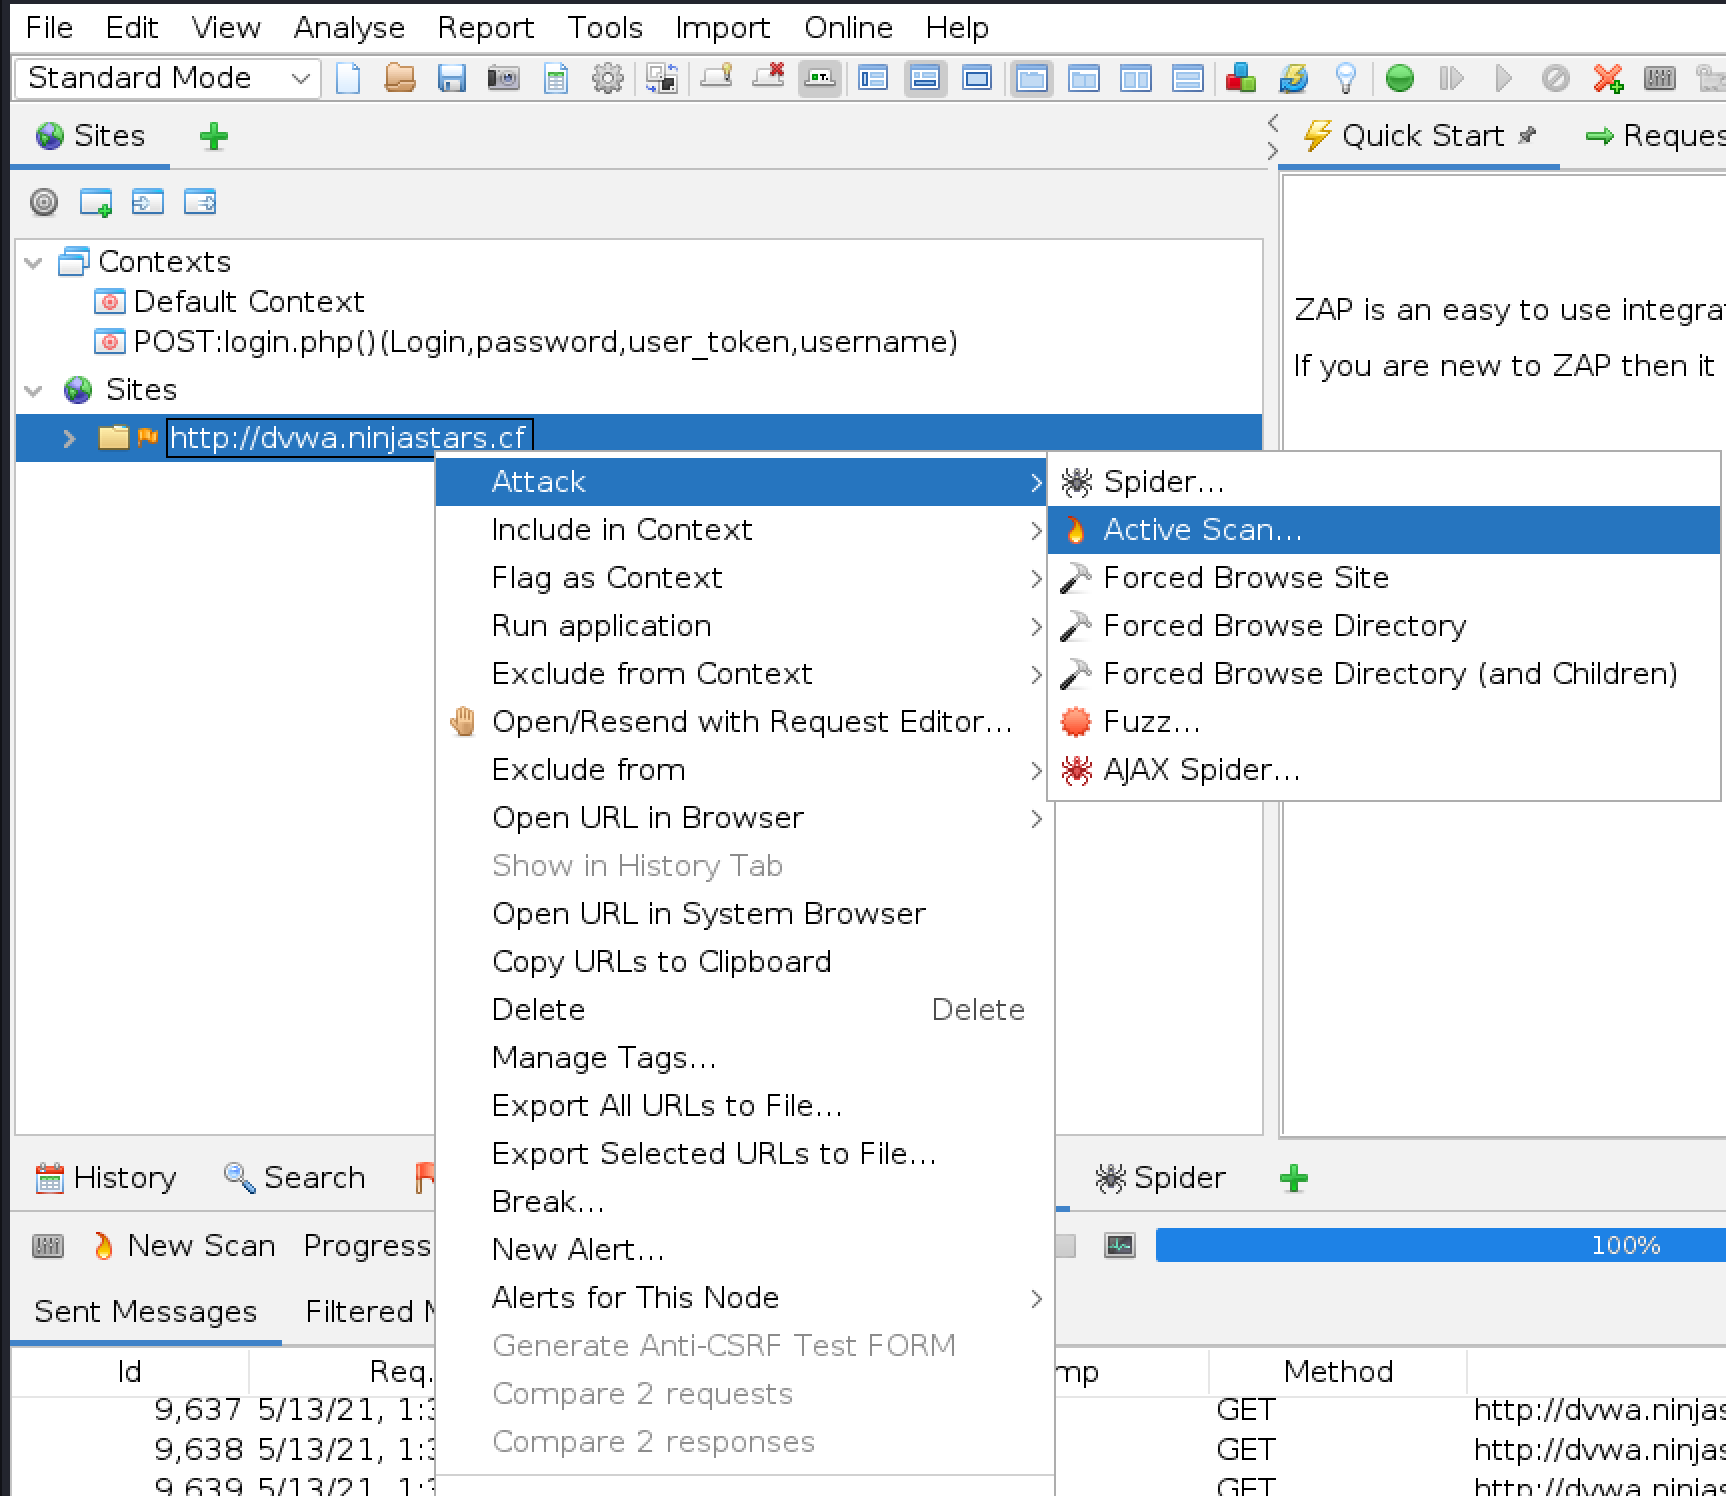
From the tree on the left, right click on the IP of DVWA, Attack, and Active Scan
Step 4 - View the Results
From Dash navigate to Firewall, Overview. Set the timeframe to something recent, like 6 hours. Under Event by Service click WAF to create a filter. Now everything in this screen will be displaying the alerts you have just generated.